To access your Flex Blast (large email) option, first login to Flex and select the 'communication' icon (chat bubbles) and select the 'FlexBlast' option:

![]()
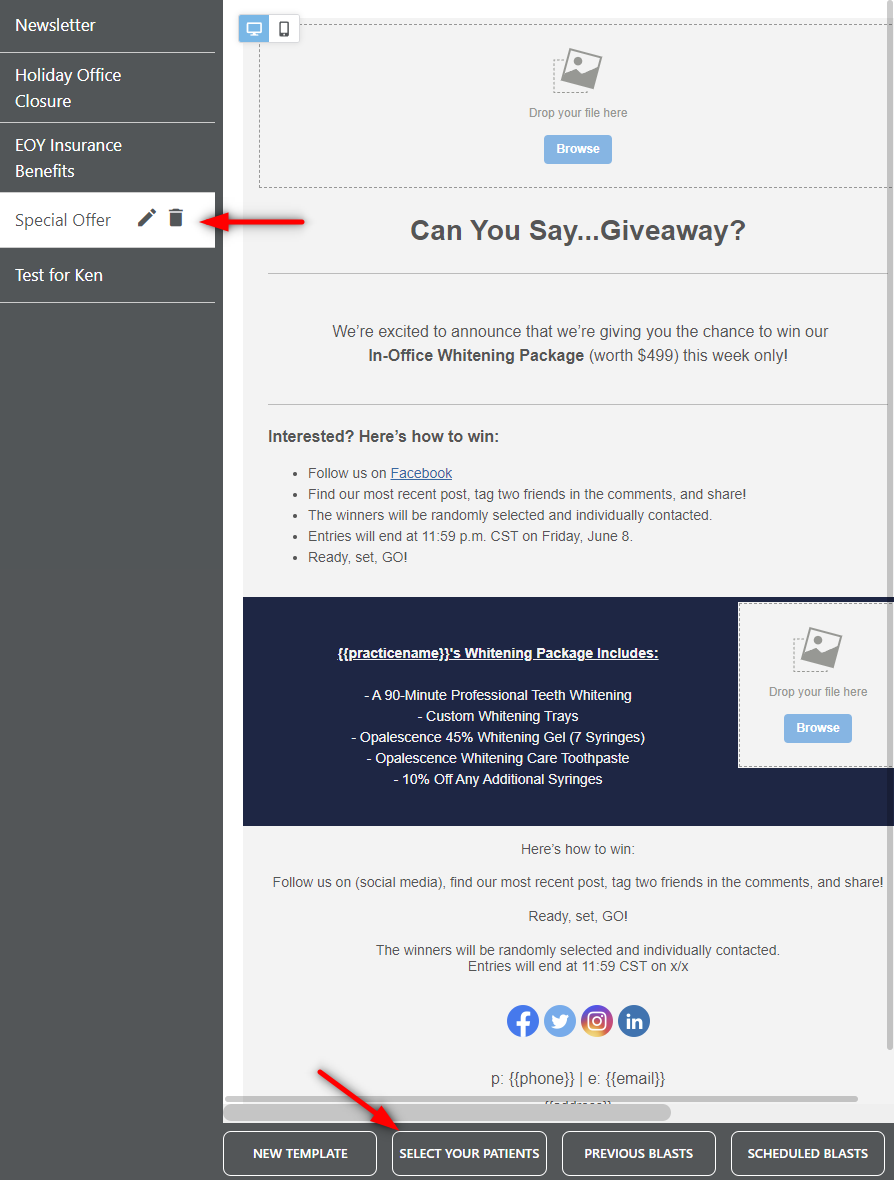
Once selected Flex will load the email editor, with a set of pre packaged templates on the left hand side. You can select any of these templates or use the 'new template' option at the bottom to create your own.
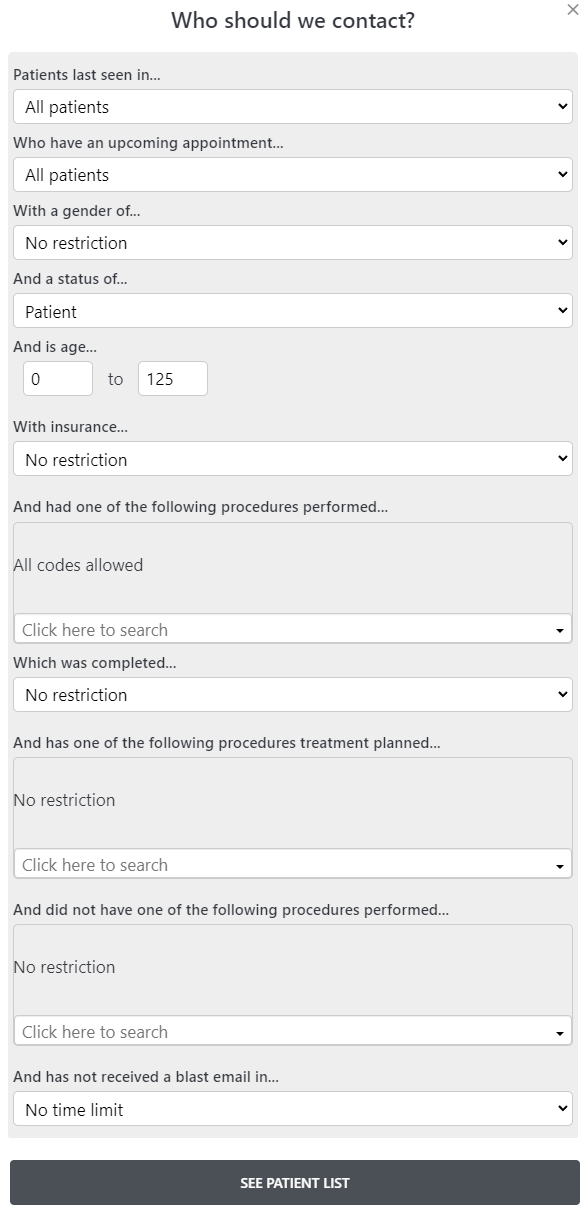
Once you select your patients, a list of filters will appear, allowing you to customize what patients are eligible to be sent to:
- Patients last seen in (how long has it been since a patient has been in the practice)
- Patients who do, or do not, have upcoming appointments
- Gender
- Patient status (read from your practice management system directly)
- Age range (minimum to maximum)
- With or without insurance
- Patients that have had a procedure performed or planned (upcoming) based on proc code
- Patients who have not received a prior blast (time range)
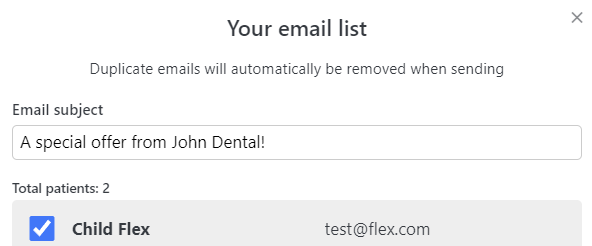
Finally select your subject line, you have the ability to select/de-select patients individually, and then send! If you received a successful prompt, your blast was sent:
If you have questions after reading the material above, please comment below or contact Flex support!
Thank you!
Comments
Please sign in to leave a comment.